upgrade tail lights

Upgrade Your Tail Lights

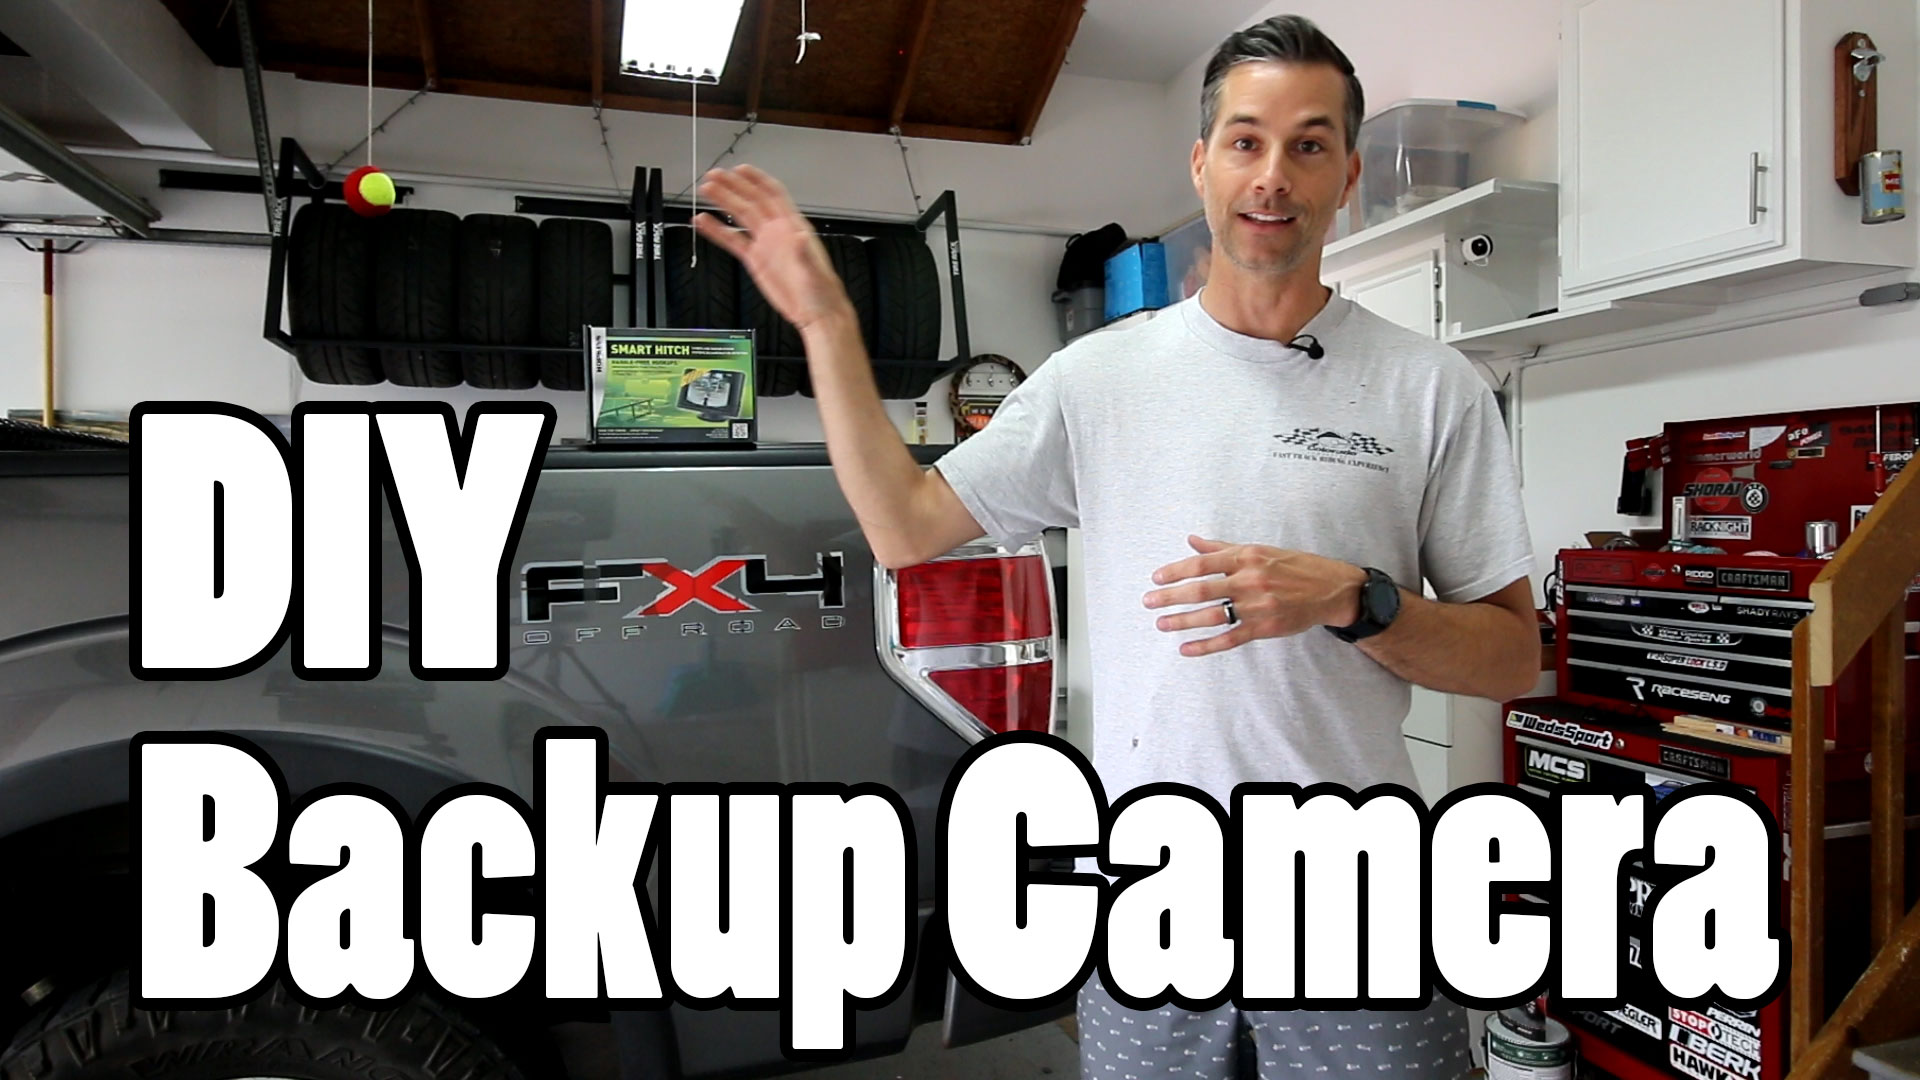
Recently, we decided to upgrade our OEM tail lights on the 2002 Ford F250 to a more modern looking piece. The smoke colored tail lights give the truck a more modern look while adding some style as well. The installation process is very simple, requiring just basic hand tools, and the lights are relatively inexpensive. For details on how to install the lights, check out the video below. Compatible with the Ford trucks listed below.

Direct OEM Vehicle Fitment: (Fits Styleside Models Only / DO NOT Fit Flareside Models)

  • 1997-2003 F-150
  • 2004-2004 F-150 Heritage
  • 1997-1999 F-250 Light Duty
  • 1999-2007 F-250 Super Duty
  • 1999-2007 F-350 Super Duty
  • 1999-2007 F-450 Super Duty
  • 1999-2007 F-550 Super Duty

How To Replace A Glow Plug Relay

Ford 7.3 glow plug relay replacement process.

The glow plug relay is a common failure point on the 7.3 Powerstroke diesel engine. My 2002 Ford F250 has suffered a GPR failure and in this video, I will show you how to test it AND replace it! The glow plug relay is critical to starting a diesel engine during cold weather, as it sends power to your glow plugs in order to heat up the engine cylinders. Fortunately, the glow plug relay replacement is pretty straightforward and can be completed with basic hand tools. The parts I use when replacing my Ford 7.3 GPR are found below.

Motorcraft DY861 Glow Plug Relay
Digital Voltmeter
Test light

Tow Mirror Upgrade

My 7.3L diesel Ford F250 is in need of a tow mirror upgrade!

One of the things I have noticed when towing race car trailers over the years, is that mirrors are very important! Most pickup trucks come with small, inadequate mirrors for towing trailers. Unless, you opt for a truck that has a towing package which often has upgraded mirrors. My 2002 Ford F250 with the 7.3L Powerstroke diesel engine came with telescoping mirrors with a small blindspot mirror. However, I found them to be inadequate as well, and went on the hunt for a tow mirror upgrade. After doing some searching, I found YITAMOTOR towing mirrors which have been a fantastic upgrade over the stock towing mirrors. The mirrors include features not found on my OEM truck mirrors, such as a turn signal and heat mirrors. In addition, they are telescoping and have a huge blindspot mirror which increases visibility in your blind areas. The installation is fairly straightforward and my video below covers all of the details, including the wiring of turn signals and heat!

Backup Camera Install

Check out my latest DIY backup camera install video for my Ford F150!

As a lot of my YouTube followers might know, I often tow my race cars to events. Attaching my trailer to the truck hitch can be a frustrating affair because the truck was not equipped with a backup camera from the factory. After many failed first hitch attempts, I decided a backup camera install was in order to aid in connecting the trailer. Now, there are all kinds of aftermarket and add-on backup cameras on the market. I wanted something that was inexpensive and easy to install. The Hopkins Backup Camera System fit my description coming in at under $100 dollars. Also, it was completely plug and play, assuming your vehicle already has trailer connections. In addition, it included a small display screen so you do not need to worry if your truck lacks an in dash screen. The installation process was also pretty simple and covered in my latest video below.

https://www.youtube.com/watch?v=gkSV5BoUQ4E

Roadmaster Active Suspension

Installing Roadmaster Active Suspension on my Ford F150.

It’s not very often that I am doing modifications to my Ford F150 pickup truck. But, this video is going to go over the process of installing Roadmaster Active Suspension kit for Ford F150 trucks. The “RAS” does a couple of things. First, it will smooth out the ride in the truck by soaking up bumps and road imperfections better. Second, it helps to increase load capacity enabling you to tow or haul more weight. I found that the Roadmaster Active Suspension did a good job of the former, but not necessarily the latter. Most driving conditions were improved and I saw less bounce and disruption in the rear of the truck, when going over bumps. However, I felt like it did not really increase my ability to tow more easily or haul heavier loads. Check out the video for all of the details on this howto video.

OS Giken Differential Install

OS Giken differential install process for your Subaru BRZ, Scion FRS, or Toyota 86.

The OS Giken Super Lock limited slip differential is a high end product that will improve your cars cornering grip. This is the latest in my Subaru BRZ upgrades for competing in SCCA STX autocross. The OS Giken differential install process is fairly straightforward. However, it does take time and some familiarity with how the rear differential comes out of your car. With the OS Giken unit installed, you can expect improved grip during mid-corner and corner exit phases. Going fast requires putting the power down and the OS Giken differential definitely helps with that.

https://www.youtube.com/watch?v=YQbHA6zT59Y

How To Clean Headlights

Restoring headlights was never this easy! Our low cost headlight restoration video shows you how!

If you have an older car, chances are you have yellowed and faded headlights. Skip the videos where people use toothpaste, of all things, to clean their headlights. I have used a number of products for restoring headlights with good results. Most recently, I have found a low cost headlight restoration kit that comes from Mothers, a well known detailing product company. The kit I like to use is the Mothers NuLens headlight restoration kit. This is a simple to use kit that has great results. You can restore your headlights in your own garage, with basic tools. There is even a no tool kit available called the Mothers PowerBall headlight restoration kit. Follow my straightforward video and you will be on your way to clear, clean, and protected headlights.

Suspension Basics

Compression and rebound are two things I cover in this suspension basics video.

Suspension and shocks can be very confusing. Even for those like myself, who have worked on and raced cars for a long time! To help others understand some suspension basics, I created this video which explains the actions of compression and rebound. Understanding these two basic functions will help make more sense of car suspension and how shocks work. In future garage talk videos, we will go over in more detail the effects of higher or lower compression and rebound. If you are curious as to what suspension I use, you can check out my MCS suspension install video.

https://www.youtube.com/watch?v=-Wx2yH8fFbs

BMW Engine Mount Replacement

BMW engine mount replacement process for my 1994 BMW 325is.

So, I have had these engine mounts from RevShift performance sitting around in my garage for many months. I finally got around to this project which also included a set of Rogue Engineering transmission. This BMW engine mount replacement process was pretty straightforward, it just takes a bit of time. The new engine and transmission mounts result in a more firm ride overall, in addition to providing more feedback through the chassis. These polyurethane mounts will also last much longer than the OEM counterparts. At this point, I believe I have replaced nearly every OEM bushing in the car!

https://www.youtube.com/watch?v=M4MKPTqWMVE

Ride Height Adjustment

Here is a quick guide on coilover suspension ride height adjustment.

With any new coilover suspension system, properly setting the ride height is one of the first tasks you must tackle. Now, ride height adjustment can seem like a difficult thing to do. However, with a little bit of guidance, just about anyone can get the job done. This is of course, assuming you are familiar with coilover suspension systems to begin with. When installing my MCS suspension, I recorded the process on my 2017 BRZ. Follow this simple video and you will be a pro at adjusting ride height yourself!

https://www.youtube.com/watch?v=kEQhUf5V1bY